I’ve always had a terrible time recording JT’s snare. From playing style (his right-hand/hi-hat hits are much heavier than his left-hand/snare hits) to cymbal types (he used to have loud hats that were good for live, but bad for recording) to cymbal placement (hats used to be right on top of the snare), it was just a nightmare. No matter what we did or tried, there would always just be a ton of bleed into the snare mics. Sometimes it was so bad, particularly during blast beats, that the hats would drown out the snare and we’d lose it in entirely in the mix. Not good when playing metal music
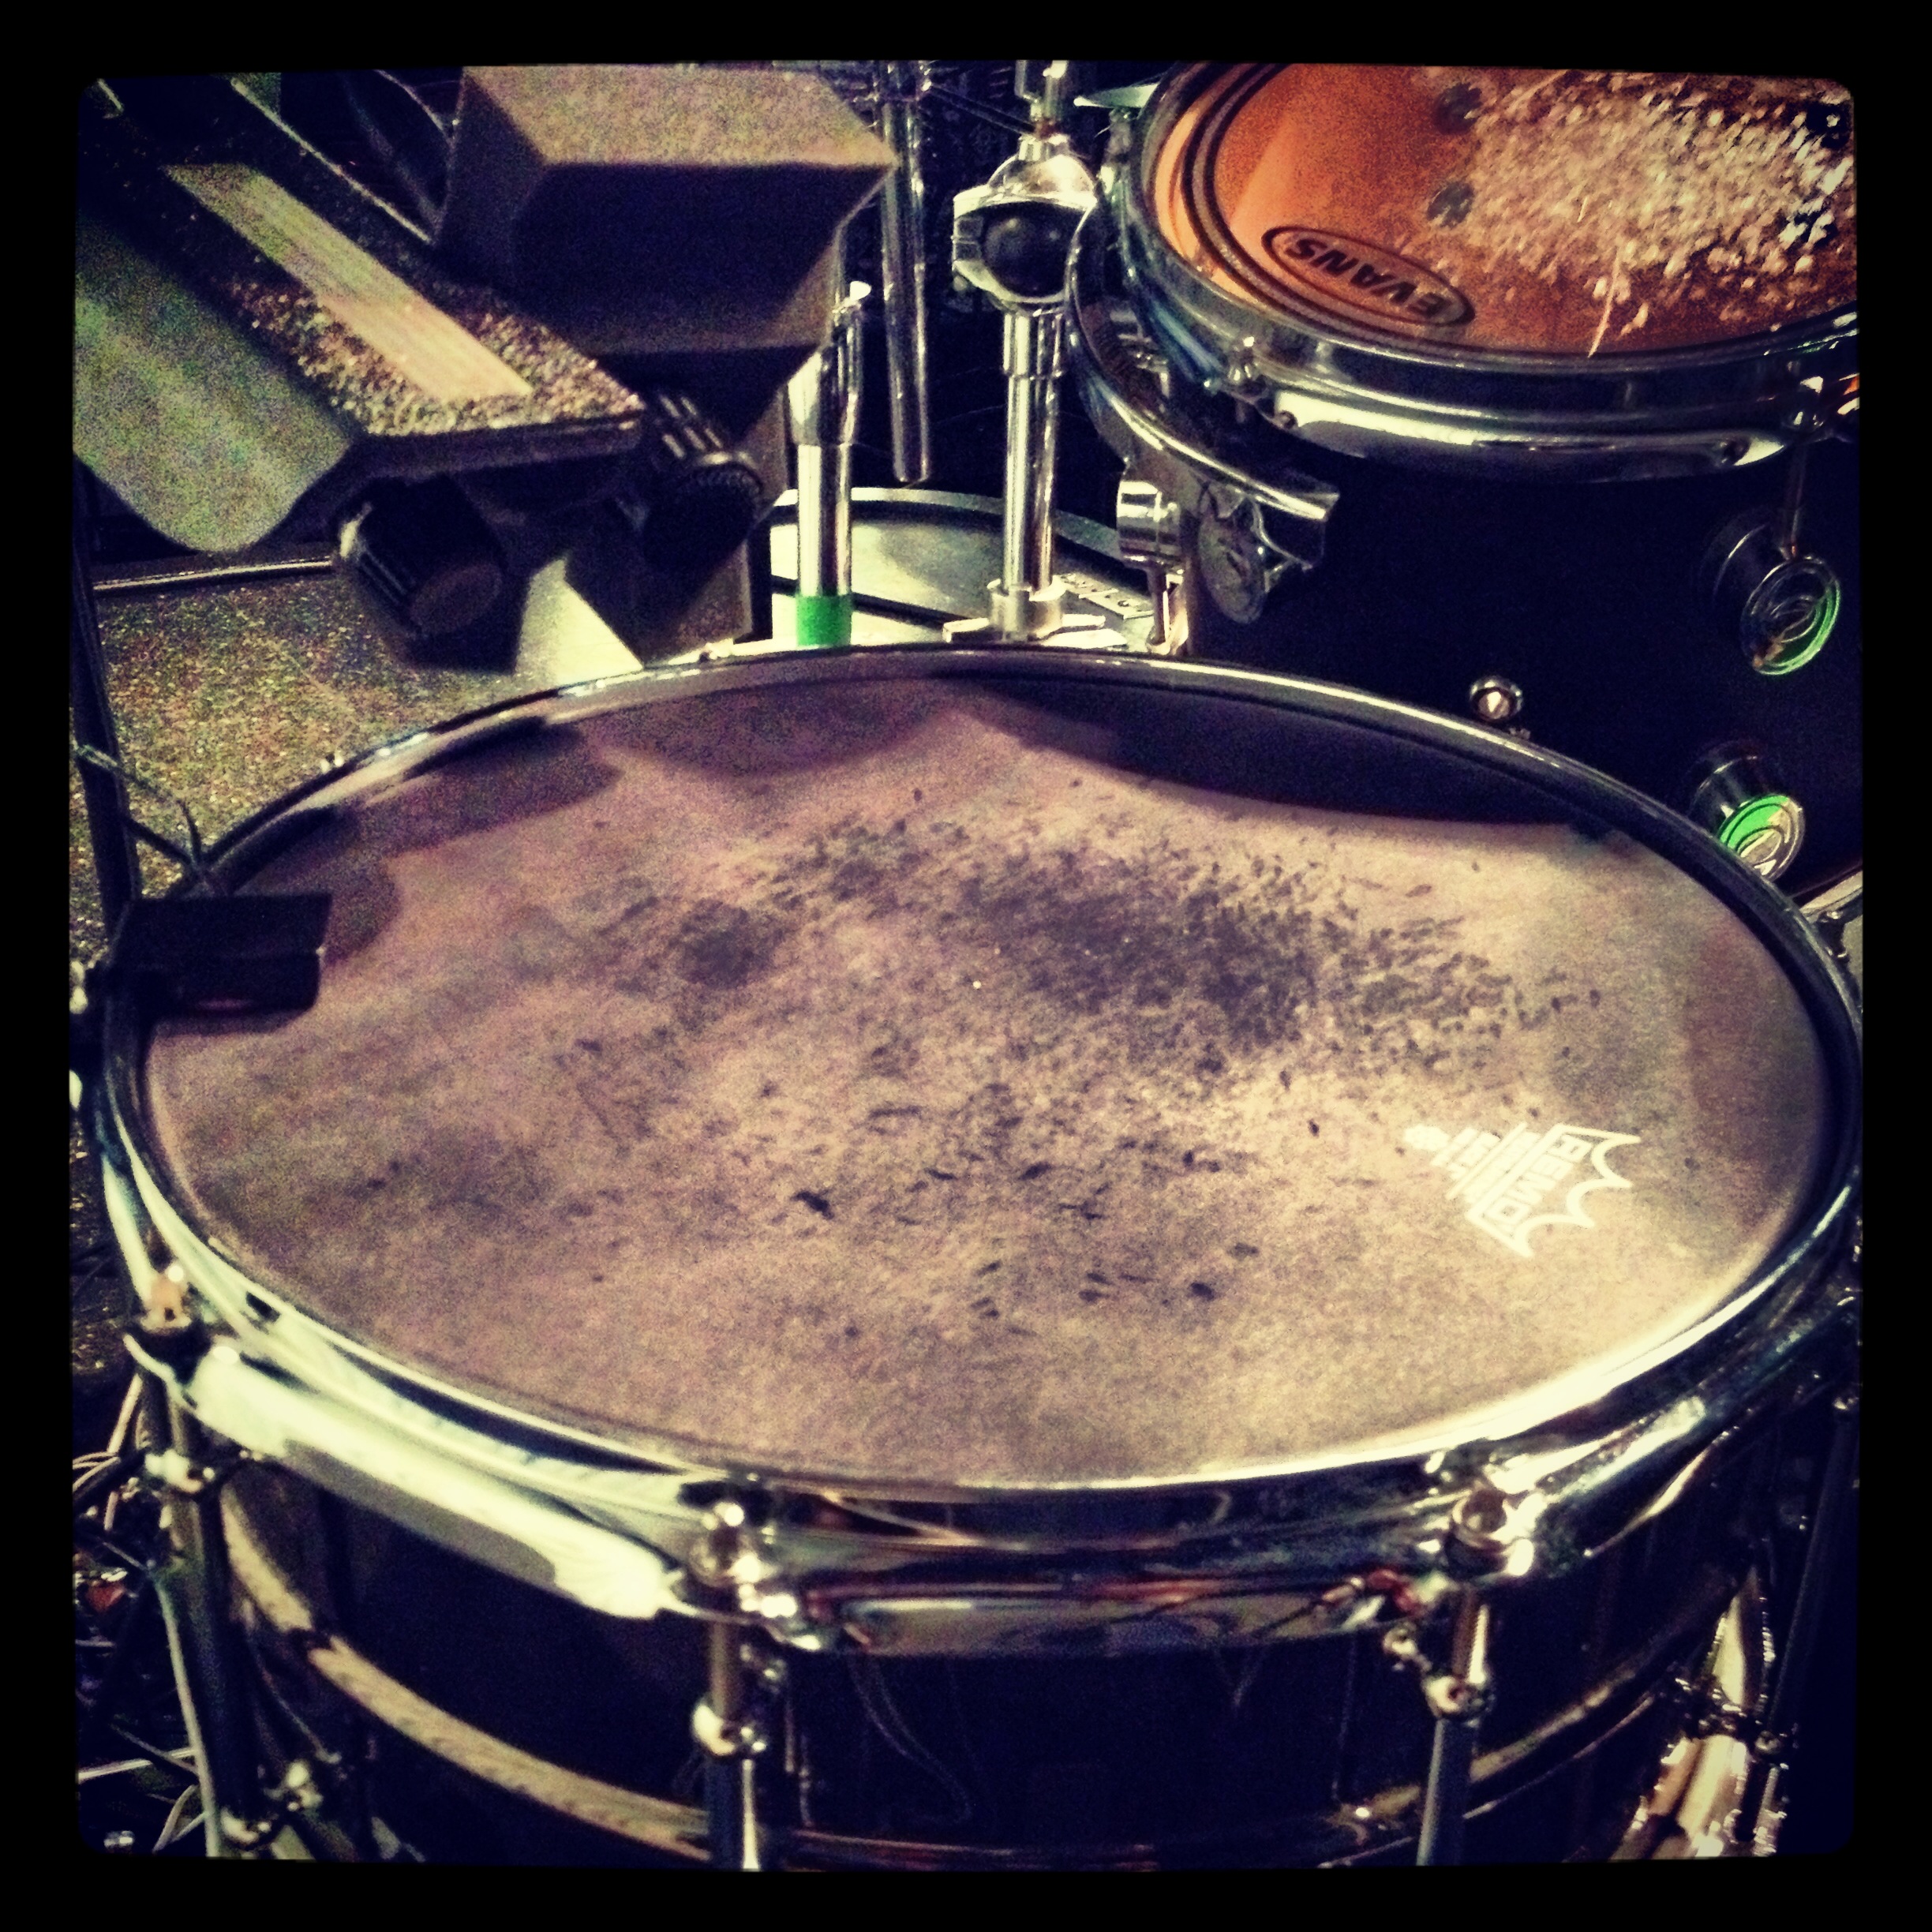
2 mics on top of snare
To JT’s credit, he really stepped up and changed many things about his playing to adapt to the necessities of recording. He realized that playing live is one thing and recording is something entirely different. Live, you want to project every hit as much as possible, especially on cymbals (which tend not to be miked in your typical small capacity venue). Recording, you want the opposite — you need to go light on the cymbals and hard on the drums. So, JT worked on his playing dynamics and really worked hard on evening out his left and right hits. That went a long way and would’ve helped a lot, but he also got studio-style hats after the last session to help reduce the overwhelming wash of hi-hat hiss — definitely a bonus for this upcoming session. Then, he went even further and practiced drumming with a more spaced out kit. It’s a big change when you’ve been playing the exact same setup for years and know where each drum is without even looking (necessary when you where a huge metal helmet on stage like he does, haha), but spacing it out added more separation between hats and snare and gave me more room to position the mics — crucial when you need the hi-hats in a mic’s null spot (more on this later). All in all, JT changed a lot about his drumming that was problematic in the studio, enabling me to capture what’s there, not losing it in a sea of white noise. The end result was nice, loud snare hits with minimal bleed. Definitely worth the effort, as I’m sure he would agree.
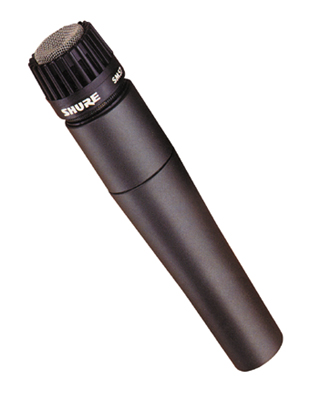
Shure SM57
Now, on to the mics. I used 3 mics and a trigger on the snare. On top, I decided to try a dual-mic combo. I’ve never been thrilled with the the snare sounds I’ve recorded… they always seemed kind of flat and two-dimensional. I’ve always used a Shure SM57, so I thought that might be the case. It’s pretty much the de facto snare drum mic in every studio around the world, so it obviously can’t be too bad, but it’s just never wowed me on it’s own. On the other hand, I have absolutely loved the Audix i5 every time I’ve recorded snare. Plus, I’ve been seeing and hearing a bunch of dual-miked snares online, and they really sounded good. So, I decided to mic the top first with a Shure SM57 and then an Audix i5 next to it, in parallel.
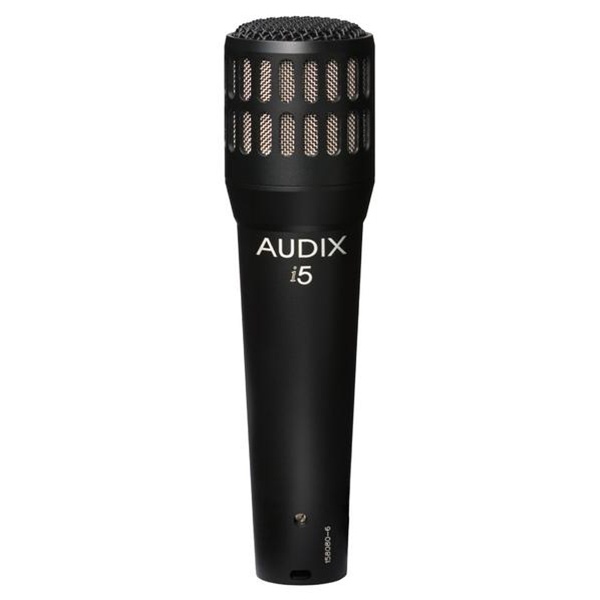
Audix i5
In an ideal world, it would have been great to have a mic on each side, each aimed at center and capturing a true stereo image of the snare, but that would’ve meant that one mic is aimed towards the hi-hats, and that would have been a no-no. I’ve already had nothing but problems with the hats even when the mics are pointing the opposite direction! So, both mics went next to each other in parallel.
I consider the SM57 the primary snare mic, so I positioned it so it sounded best. With the hats now further from the snare, I could get the SM57 straight in from the hi-hat sound, leaving the hats directly behind the mic in the null spot. Every cardioid mic has a null spot. The very nature of the cardioid polar pattern is that it picks up what’s in front of the mic and rejects what’s behind it. This is why almost all live mics are cardioid. Imagine if a singer’s vocal mic wasn’t cardioid and didn’t reject the noise behind it. There’d
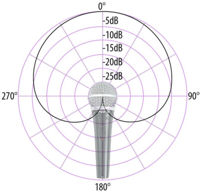
Cardioid pattern picks up whats in front and to the sides and rejects everything else.
be non-stop feedback. However, since cardioid only picks up what’s in front, it reduces what it picks up and means we only get feedback when a mic gets pointed towards a speaker. Well, that same logic applies in the studio. If you mic a snare with a cardioid mic, whatever’s behind the mic will be rejected. This means you’d ideally want to mic the snare directly from where the hats are, placing the hats behind the mic and thereby letting the mic reject the majority of the their sound. It’s tough to do this, though, especially if the hats are close to the snare. There just won’t be enough room to get a good angle on the snare AND keep the hats in the null spot AND keep the mic out of the way of the drummer. It’s usually a compromise and rarely do you get all three. Even with the drumming changes we made for this session, I still couldn’t achieve all three. In the end, I opted for getting a good angle on the snare and keeping the mic out of the way of the drummer. I compromised on getting the hats in the null spot, but it was close enough that a good portion of the hat sound was reduced.
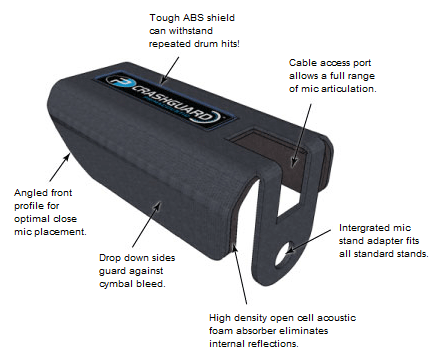 Besides, I had one more trick up my sleeve to kill the hats. I placed a ton of shielding around both snare mics, just to go the extra mile to kill any bleed. On the SM57, I used a Primacoustic CrashGuard. These are relatively new and it’s my first time using them, but man, they are amazing! It’s a plastic shield with foam on the underside that mounts to a mic stand and acts as a shield or “roof” to protect the mic under it from cymbal bleed. I had to be careful about angling the SM57 that it was shielding. If you angle the mic too much towards the shield, things can start sounding a little boxy — it becomes kinda noticeable (to my ears, at least) that something was there that was influencing the sound a bit. If you angle the mic too far away from the shield, you lose most of the benefits of it’s shielding. I eventually found the sweet spot and it worked absolutely perfectly.
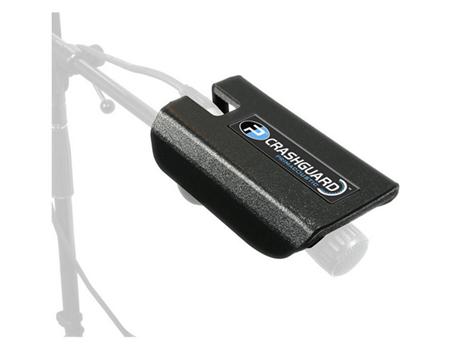
Primacoustic CrashGuard
Between null spot positioning and the CrashGuard, I finally had a loud, clean, punchy snare with minimal bleed. On the Audix i5 mic, there wasn’t enough space to get another CrashGuard in there, so I instead used an Auralex Xpander foam piece. It’s a simple, rectangular piece of foam with a baffled side to break up sound, and a hole in the middle to stick a mic through it. I have to say, when I listened back and forth between the CrashGuard mic and the Xpander mic, there was a HUGE difference — the CrashGuard
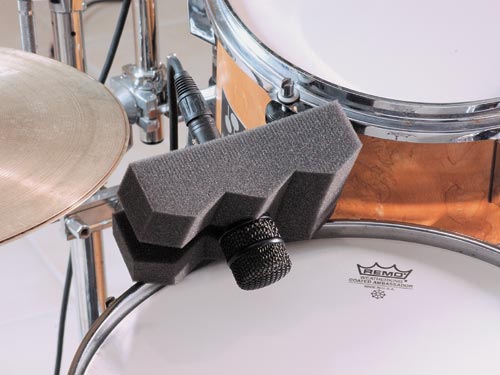
Auralex Xpander
killed like 70% more hat bleed. The Xpander killed a decent amount, maybe 20-30%, and it was definitely better to have it in place than not. However, the CrashGuard won by a mile. (Admittedly, though, the CrashGuard mic was in a better spot and was null-rejecting more of the hat noise than the Xpander mic, plus the two mics were altogether different. It’d be interesting to see how the CrashGuard compares to the Xpander on the same mic in the same position. A future post, for sure!)
On the bottom of the mic, I placed another Shure SM57 to capture the snare wires. There’s no real magic to this one, just angled it away from the hats just like I did the top mic, although I did find a steeper vertical angle sounded better than a shallower horizontal angle. Your mileage may vary depending on how the drum sounds. The only catch with the bottom mic is that you will almost always have to invert the phase for this mic on your preamp or mixing console. Play around with mic position and phase until the bottom mic sounds good with the top mic(s). Remember, you’re capturing mainly snare wire sound on the bottom with just a touch of body to it. It’s not going to sound huge and thick like the top mic does. Play around with it until you’re adding a nice good crack sound to the top mics without losing any of their body — that’s when you’re in a good spot.
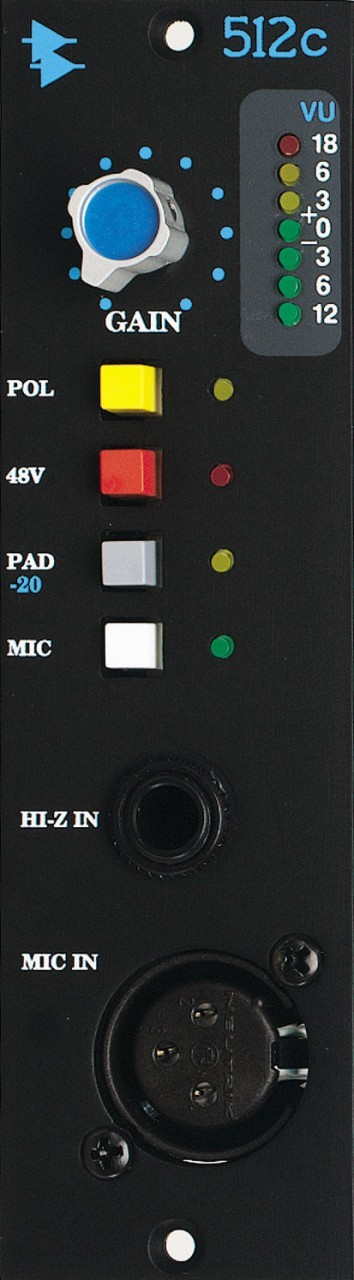
API 512c
Lastly, I mounted a piezo trigger on the top snare head to capture each hit. I’ll use this trigger signal for blending in samples and perhaps use it to trigger a noise gate if there are any parts that need extra help and definition. For the most part, though, I’m very, very pleased with the snare sound I’m capturing and have a spare trigger track, just in case. Insurance is never a bad thing!
- API 512c
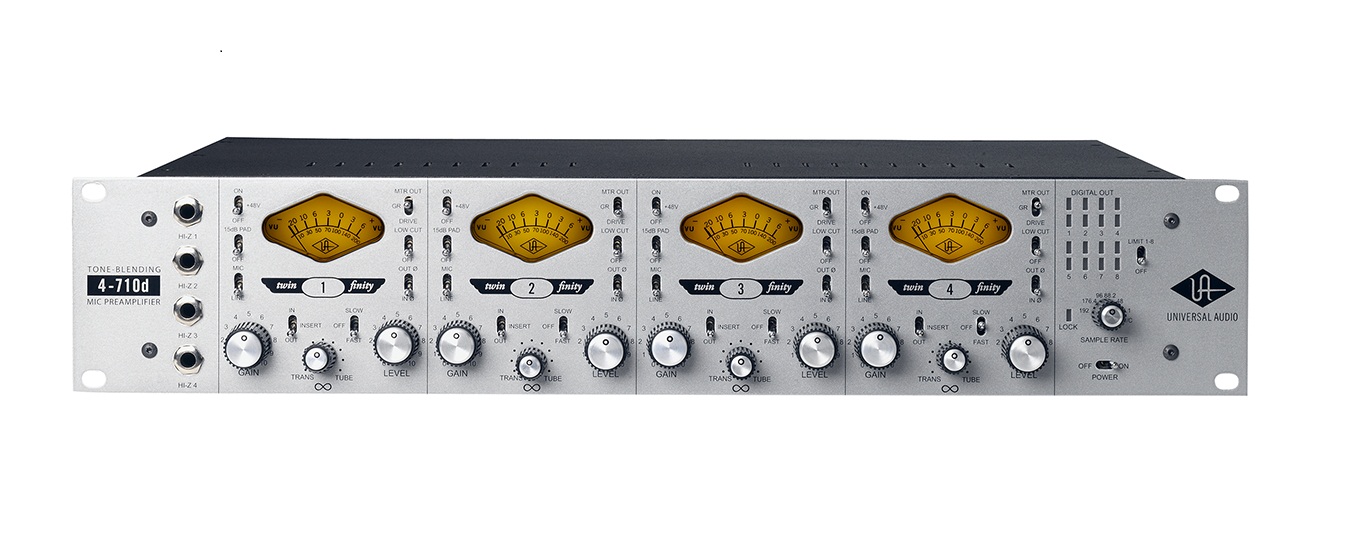
For preamps, the top SM57 went into an API 512c for the same reasons as the kick mic — I need something fast and punchy. The API preamp will almost always win that battle. The other top mic, the Audix i5, was fed into a channel of the Unverisal Audio 4-710d. I set it to 100% transistor mode so that it had a faster transient response. After all, tubes, by their vary nature, tend to slow transient response, and we definitely don’t want that on drums. The bottom SM57 went into an on-board preamp on my Allen & Heath ZED R16 mixing console. The pres on the ZED R16 are nothing to scoff at and are very high quality, so I had no qualms whatsoever about using them.
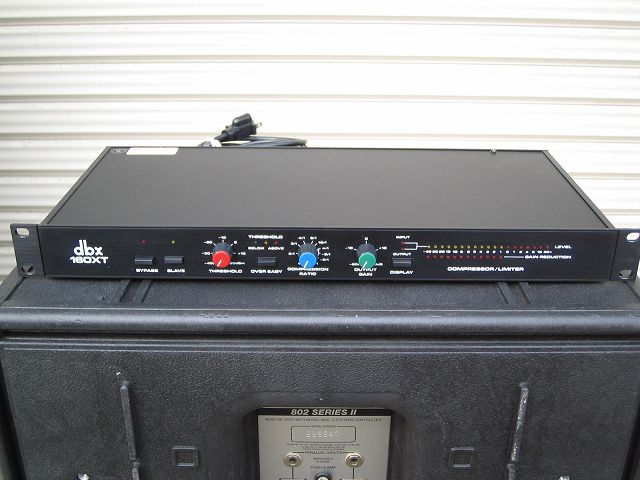
dbx 160XT
For processing, I gave both top mics a slight 3db boost around 200Hz to give the snare a bit more body. We had tons of *crack*, but it just need a touch of *oomph*. The bottom mic was unaltered.
For compression, the top SM57 going in the API 512c was sent to a vintage dbx 160XT compressor set to 4:1 ratio and -3db gain reduction. This is a really dirty, gritty compressor that sounds great on drums. The Audix i5 going into the 4-710d pre was sent to the 1176 compressor built into the preamp channel, on the Slow setting and about -3db reduction as well. These are very mild, almost imperceptible compression settings, but the goal is just to shave a few db’s off the loudest peaks to even things out a bit before being sent to the DAW.
 Snare is probably the trickiest single drum to record, but I’m very pleased with how it all turned out.
