Recording: Drums (Day 3 – Finished)

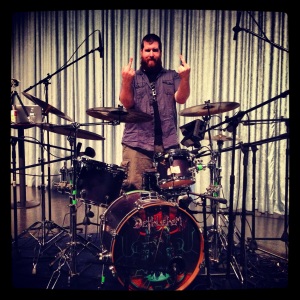
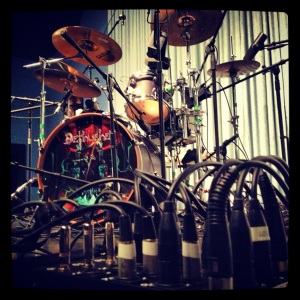
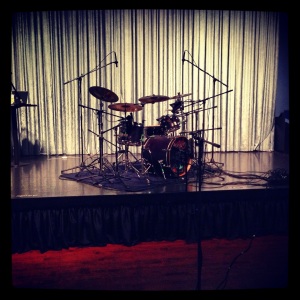
The full drum setup

The full drum setup

Drums are all finished.

We hammered out 9 songs over the course of 3 days and we’re pretty happy with the sounds. The songs have a bunch of tempo and timing changes in them, so it was impossible to nail the songs in a single take — we ended up doing tons of punch-ins to get things just right, so that means a TON of editing to make each take flow seamlessly together without any obvious cuts.

Since we only had 3 days to record (technically, only 2 since the first day was all setup and testing), we went for the 95% rule on each take: if a take wasn’t at least 95% perfect, we re-recorded it. Ideally, you don’t want to settle for anything less than 100%, but that’s also not really practical when you’re doing an independent record and are pressed for time. It’s a minor compromise we can live with.

All finished. Classy.

All finished. JT is classy.

The 95% rule meant we would let very tiny things slide. For example, if we had a 6-bar section that was all fast double kick,  and everything sounded great but the kick had a few slight hitches or uneven hits here and there within those bars, we would live with that take — 95% of it was good, it just needs a tiny bit of polish. It’s easier for me to go in afterwards, during editing, and quantize that kick so it’s perfectly even with the timing grid than it would be to keep pounding out take after take. Besides, it’s smarter to have all of the songs at 95% and polish it later than it is to spend tons of time getting some songs to 100%, but then running out of time and having to rush the remaining songs, perhaps risking achieving only 80% or so on those.

That’s all speculative, of course, but we stuck with this approach and it worked perfectly for the amount of time we had for drum tracking, as we wrapped up with no time to spare. Overall, we’re happy with the outcome and with a little spit and polish (and editing), they’ll be 98%-100% where we would ideally want them. We can live with that and be proud of the results.

Now it’s time to enter Editing Hell. This is probably my least favorite part of the process, but it’s a necessary evil. I’ll be spending a bunch of time editing each recorded track to make sure the various takes are seamless, the hits line up perfectly in time, any bad hits/rimshots/etc. are replaced with good hits, and removing unnecessary junk audio from the tracks (like cutting out all of the bleed between hits on the tom tracks). I’ll detail this step in the process, too, but be forewarned: it’s about to become even more tedious, haha.

Posted in Uncategorized | Tagged , , , | Leave a comment

Recording: Drums (Day 2)

It’s Day 2, and we’re ready to start tracking.

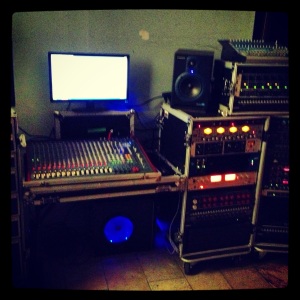
Day 1 was spent converting a church-turned-nightclub into a church-turned-nightclub-turned-studio, setting up a control room, running mics and cables, and doing sound tests. We recorded a bunch of sound tests and listened to playback, made some minor tweaks to levels, and that’s about it. Everything is sounding good and we’re ready to start tracking.

Here’s what the raw drum tracks sound like — the only processing done is the very minor bit of EQ and compression that was done during tracking, which was mainly just kick and snare:

And here’s what everything sounds like mixed together, along with some rough gating, EQ and compression. Obviously, this isn’t representative of what the final drums on the album will sound like, but it’ll give you a rough idea of what things are starting to sound like as the elements start coming together:

Lots of work left to do, but this should give you an idea of what it all sounds like. I still need to carve out some of the muddy/boxy frequencies on the drums and blend in a few samples, but I’ll do that in mixing when I have all of the instruments recorded.

For now, we still have more tracking to do. About 2/3 done tracking drums, we’ll wrap everything up on Day 3.

Posted in Uncategorized | Tagged , , , , , | Leave a comment

Recording: Drums (Day 1 – Room mic setup)

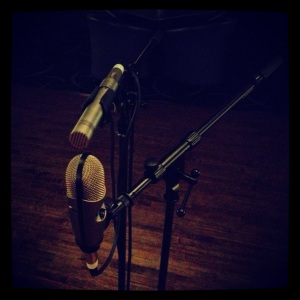
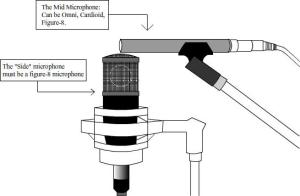
CAD GXL1200 & CAD M179 in Mid-Side technique

CAD GXL1200 & CAD M179 in Mid-Side setup

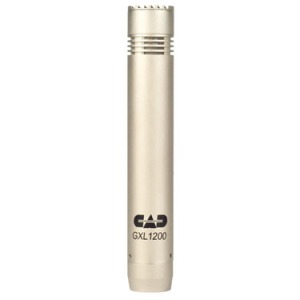
CAD GXL1200 SDC

CAD GXL1200 SDC

So I have all of my drum mics setup, and everything is sounding great. I want to capture a the hugeness of the kit, so I setup a pair of room mics that I’ll later mix in to add a splash of natural reverb and echo.

Remember the equilateral triangle we setup for the overhead mics? The left and right mics were both 44″ from the center of the snare, and also 44″ apart from each other. Well, that number is going to come into play again as we add distant mics in the room.

To keep things simple an in phase, I used the 3:1 Rule. That is, distant mics should be 3 times the distance from the source as the other mics. So, since my overheads are 44″ from the center of the kit, I want my room mics to be 3 times that distance, straight out from the center. I got out the measuring tape and placed the mic stand 132″ (or 11 ft.) away.

I decided to try the mid-side miking technique. I had never done it before, but it sounded interesting. What you do is take a condenser mic and aim it at the source. In this case, I aimed a CAD GXL1200 small diaphragm condenser (SDC) straight ahead at the drum set.

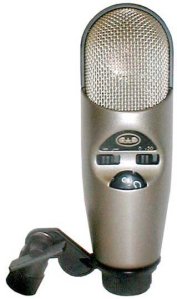
CAD M179

CAD M179

Then, directly below the capsule of that mic, you place another condenser mic in Figure 8 mode and aimed to the side. This mic must be able to do a Figure 8 polar pattern or the mid-side technique will not work. Here again I grabbed my trusty CAD M179 large diaphragm condenser (LDC) mic, put it into Figure 8 mode and positioned it so its aimed to one side of the room.

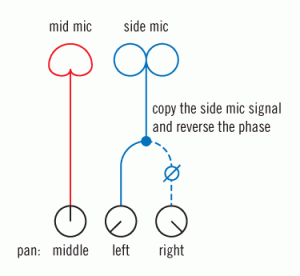
Ok, so we have 2 condensers setup: one aimed at the kit, the other covering one half of the room. How does that sound good? Well, if they’re both panned to center, it’ll sound alright, but nothing special. Now, leave the top mic at center, and pan the bottom Figure 8 mic hard Left. How’s that sound? Probably not too good — it sounds incomplete because one half of the stereo image is missing. This is where it gets neat and where mid-side technique is really cool

Mid-Side panning

Mid-Side panning

Mute the top mic. You should now just hear the Figure 8 mic to the left. Take the feed from that Figure 8 mic and split it into 2 channels on your mixer. Pan the duplicate feed hard Right and phase invert it. Now listen. You should have a big wide stereo image field, but the center will sound hollow. Why? Because Figure 8 mics capture sound from both sides. You panned 2 copies of the same signal to the left and to the right, so the places where they join — the center of the stereo image — are exactly the same. They cancel each other and are silent, creating a gap in the center. Now raise the volume of your top, center mic. You should now have a huge, full stereo sound cover Left, Center and Right. It’ll sound very 3-dimensional, almost as if you are in the actual room, not just listening to it on monitors.

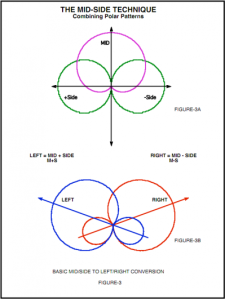
mid_side_polar_patternsNot only are you getting a 3-mic stereo spread from only 2 mics, but there’s also a practical benefit to this: if you collapse the entire mix down to mono, the two Figure 8 mics panned Left and Right will perfectly cancel each other out, leaving only the center mic audible. How cool is that? The need for mono-compatibility is fading out, but it’s still something to consider when you’re creating professional recordings that could potentially be played on many different sound systems. Some people swear by just single mono room mics, others do traditional X/Y, A/B, etc. stereo pairs… there’s really no wrong way. I went with mid-side because i wanted to capture the hugeness of the room, and also to try out a new mic technique. I’m very pleased with the results and would definitely use it again.

Mid-Side mic placement

Mid-Side mic placement

[Side note: If you want to do mid-side but only have 2 open channels instead of 3, you can always just record the 2 mics as-is and then duplicate the recorded track in your DAW instead of splitting it out on the analog/mic side. In fact, to make it even easier, there are multiple plugins out there to M-S (mid-side) decode a track this way without even having to duplicate it. Whatever suits your workflow best.]

Posted in Uncategorized | Tagged , , , , | Leave a comment

Recording: Drums (Day 1 – Hi-Hat and Ride setup)

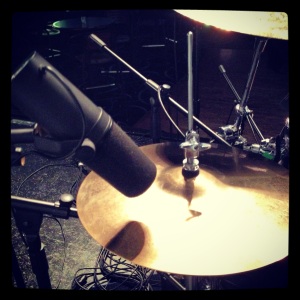
Shure SM7B on hi-hats

Shure SM7B on hi-hats

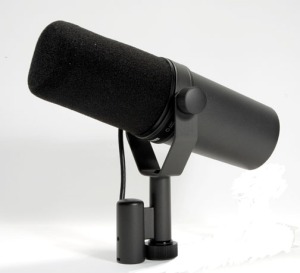
Shure SM7B

Shure SM7B

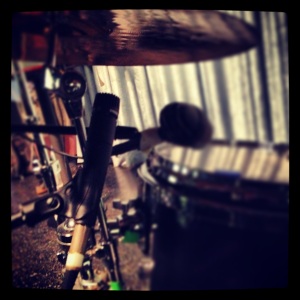
Shure SM57 on ride

Shure SM57 on ride

At this point, I had the overheads setup, measured and in-phase; setup the kick drum mic; had the snare top- and bottom- mic’d; put top and bottom mics on the rack and floor toms;  and placed triggers on the kick, snare, rack tom and floor tom.

We did a few audio tests and I had good coverage across the entire kit. However, I wanted to space the kit out a bit further and exaggerate the width of the kit. My overheads are already pretty wide, physically speaking, and the overheads are already panned hard left and hard right on the mixer. So how do you make the kit wider?

It’s all about panning and placement, and faking things a bit. If I solo the overheads by themselves, it already sounds big and wide due to the physical placement and panning. Now, if I pan each mic inward a bit, maybe 80% Left and 80% Right, I still have a huge wide stereo image. But, I created a sliver of space over on the far sides at 100% Left and Right. So, what I do is find the cymbals at the extreme outer edges of the kit, mic those and pan them hard left and hard right. The result is a super wide kit (from the overheads) that now sounds even wide because direct, close-miked sources (hi-hat and ride) are placed at the extreme outer reaches. It’s kind of a psychoacoustical effect, and it works well.

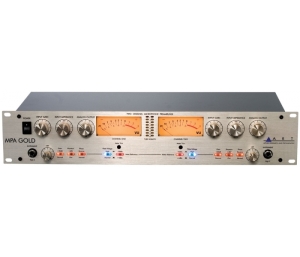
On the hi-hat side, I setup a Shure SM7B mic. This mic is traditionally a broadcast/radio mic, but it’s received a lot of acclaim and use as a vocal mic, especially for screaming vocals. It has a depth, body and smoothness that tames harsh vocals in a good way. Rather than losing their grit and balls, things sound aggressive-but-not-harsh, and it settles into a mix nicely. Well, the same reasons it works on harsh vocals are the same reason it’s nice on other harsh sources, such as guitars and even hi-hats. I put it on these hi-hats and it tamed them nicely, while still being crisp. I ran this mic into an ART MPA Gold tube preamp (review coming soon) to further mellow the harshness. No EQ or compression.

shure_sm57On the ride, I miked it from below using a Shure SM57 pointed near the bell. You’ll have to listen to find the sweet spot on any particular ride. This one happened to sound best near center. No tricks or special notes on this one, just a 57 going into the other channel of my ART MPA Gold preamp to tame the harshness.

I panned the hi-hat/SM7B hard right and the ride/SM57 hard left. When I bring up the OHs, these blend right in and provide some nice extra wideness and separation.

ART MPA Gold preamp

ART MPA Gold preamp

Posted in Uncategorized | Tagged , , , , | Leave a comment

Recording: Drums (Day 1 – Floor Tom setup)

Floor Tom

Floor Tom

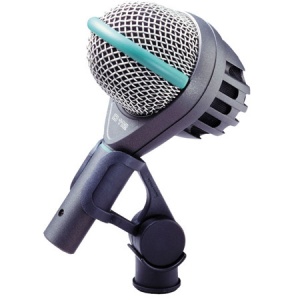
AKG D112

AKG D112

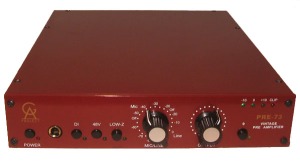
Golden Age Pre-73

Golden Age Pre-73

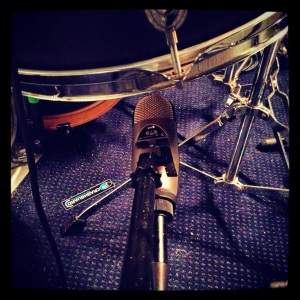
Floor Tom (bottom)

Floor Tom (bottom)

Ahh floor toms… I wish all drums were as easy to mic as you.

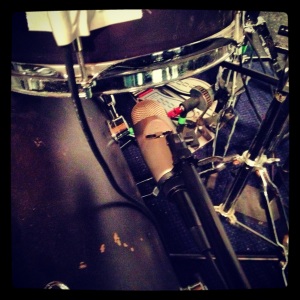
Floor toms are usually far enough away from all of the cymbals that there’s rarely any bleeding problems. On JT’s drum kit, the tom mounts to the ride stand, so they’re pretty comfortably close. His floor tom was practically wearing the ride as a hat, so I had him raise the ride a few inches to provide some separation and give me some room to work a mic in there. We created enough space that his playing wasn’t hampered and I could safely place something that sounded good while still being out of the way.

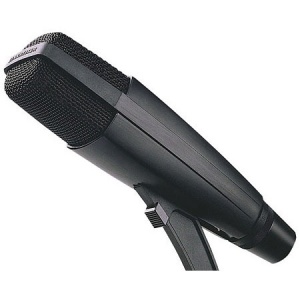
My go-to tom mic is usually the CAD M179. It’s a multi-pattern condenser and almost always sounds great on toms when you need a nice, full, natural sound. Unfortunately, metal drums are anything but natural. So, rather than a condenser, I went to my #2 go-to tom mic: the Sennheiser MD421 MKII. The MD421 always sounds great, and this time was no exception. However, I had heard of others successfully using kick mics on floor toms to capture more of the low end and body, so I tried an AKG D112 kick mic on it. BINGO! It sounded HUGE and had a nice attack to it. It paired well with the MD421 that was on the rack tom, surprisingly. I don’t know why, but I just didn’t think they would sound decent together, but I was, gladly, wrong.

I ran the D112 to a Golden Age Pre-73 preamp (Neve 1073 clone), and it sound huge. Tons of low end and boom, but with a nicely defined top end. No compaints at all.

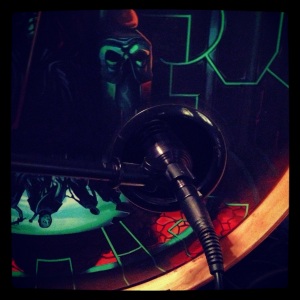
On the bottom, I took my trusty CAD M179, set it Super Cardioid mode, and placed it under to capture the boom from the bottom. Again, remember to play with phase and mic positioning when bottom-miking a drum!

The M179 went to an onboard preamp on the Allen & Heath ZED R16 console. No EQ or compression on any of the mics… saving that for mixing stage.

A piezo trigger was used on the top head to cleanly capture the hits. This will be used for triggering samples for tone-blending and also to trigger noise gates.

Posted in Uncategorized | Tagged , , , , | Leave a comment

Recording: Drums (Day 1 – Rack Tom setup)

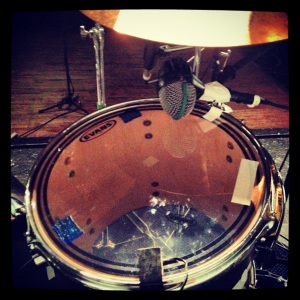
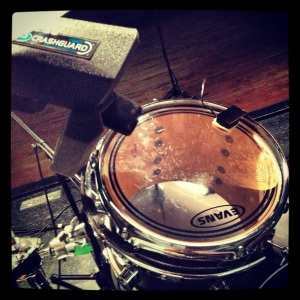
Rack Tom

Rack Tom

Sennheiser MD421 MKii

Sennheiser MD421 MKii

Golden Age Pre-73

Golden Age Pre-73

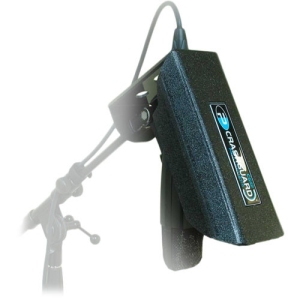
Primacoustic CrashGuard 421

Primacoustic CrashGuard 421

This drum kit is a simple 4-piece, so there’s only a rack tom and a floor tom to mic. It makes for a nice, tightly-defined stereo image and reduces the number of mic placement issues. It makes my job as engineer a whole easier!

The rack tom was simple to mic. I used a Sennheiser MD421 MkII mic on topwith the attenuation switch set to ‘M’ (Music). This was fed into a Golden Age Pre-73 preamp, which is a great Neve 1073 clone, especially for the price (future review coming). I didn’t EQ or compress the signal. I left the tracks unaltered so I could tweak it just right in the mix. The top mics capture a good amount of attack and body, and the MD421 really shines on toms.

Just like with the snare, there were some concerns about cymbal bleed. This rack tom is right next to and just a few inches below a large crash, so every time its hit, I would get a blast of cymbal hiss in the mic. So, I ended up usingboth a Primacoustic CrashGuard and an Auralex Xpander on this mic to kill the bleed. It looked like a Frankenstein contraption, what with the Xpander foam jammed into the CrashGuard housing and a MD421 poking through, but it worked really well. No more crash problems!

We really wanted big, huge toms, so I mic’d the bottom using a CAD M179 multi-pattern condenser. Again, killer mic value for the money, and it’s super versatile — if you only had this and a Shure SM57 in your mic locker, you could still record just about anything and it’d sound great. I set it to Super Cardioid mode so that it was really just picking up the bottom of the tom. I tried the other patters, hoping something like Figure 8 mode would help me pickup a lot more body, but it just ended up picking up too much of everything. That’s pretty much was the expected result, but hey, gotta try and experiment so you know for sure. The M179 was run to a preamp on the Allen & Heath ZED R16 console; no EQ or compression.

You may have to invert the phase on the bottom mic. Play around with phase and position until it sounds right to your ears.

Lastly, I used a piezo trigger on the drum head to trigger samples and noise gates.

CAD M179

CAD M179

Rack Tom (bottom)

Rack Tom (bottom)

Posted in Uncategorized | Tagged , , , , | Leave a comment

Recording: Drums (Day 1 – Snare setup)

I’ve always had a terrible time recording JT’s snare. From playing style (his right-hand/hi-hat hits are much heavier than his left-hand/snare hits) to cymbal types (he used to have loud hats that were good for live, but bad for recording) to cymbal placement (hats used to be right on top of the snare), it was just a nightmare. No matter what we did or tried, there would always just be a ton of bleed into the snare mics. Sometimes it was so bad, particularly during blast beats, that the hats would drown out the snare and we’d lose it in entirely in the mix. Not good when playing metal music
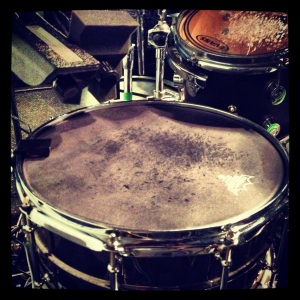
IMG_0303

2 mics on top of snare

To JT’s credit, he really stepped up and changed many things about his playing to adapt to the necessities of recording. He realized that playing live is one thing and recording is something entirely different. Live, you want to project every hit as much as possible, especially on cymbals (which tend not to be miked in your typical small capacity venue). Recording, you want the opposite — you need to go light on the cymbals and hard on the drums. So, JT worked on his playing dynamics and really worked hard on evening out his left and right hits. That went a long way and would’ve helped a lot, but he also got studio-style hats after the last session to help reduce the overwhelming wash of hi-hat hiss — definitely a bonus for this upcoming session. Then, he went even further and practiced drumming with a more spaced out kit. It’s a big change when you’ve been playing the exact  same setup for years and know where each drum is without even looking (necessary when you where a huge metal helmet on stage like he does, haha), but spacing it out added more separation between hats and snare and gave me more room to position the mics — crucial when you need the hi-hats in a mic’s null spot (more on this later). All in all, JT changed a lot about his drumming that was problematic in the studio, enabling me to capture what’s there, not losing it in a sea of white noise. The end result was nice, loud snare hits with minimal bleed. Definitely worth the effort, as I’m sure he would agree.
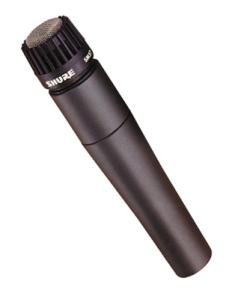
shure_sm57

Shure SM57

Now, on to the mics. I used 3 mics and a trigger on the snare. On top, I decided to try a dual-mic combo. I’ve never been thrilled with the the snare sounds I’ve recorded… they always seemed kind of flat and two-dimensional. I’ve always used a Shure SM57, so I thought that might be the case. It’s pretty much the de facto snare drum mic in every studio around the world, so it obviously can’t be too bad, but it’s just never wowed me on it’s own. On the other hand, I have absolutely loved the Audix i5 every time I’ve recorded snare. Plus, I’ve been seeing and hearing a bunch of dual-miked snares online, and they really sounded good. So, I decided to mic the top first with a Shure SM57 and then an Audix i5 next to it, in parallel. 
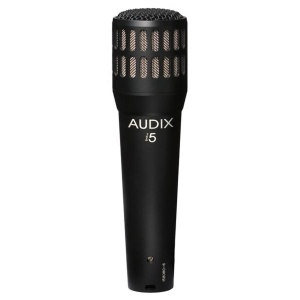
Audix i5

Audix i5


In an ideal world, it would have been great to have a mic on each side, each aimed at center and capturing a true stereo image of the snare, but that would’ve meant that one mic is aimed towards the hi-hats, and that would have been a no-no. I’ve already had nothing but problems with the hats even when the mics are pointing the opposite direction! So, both mics went next to each other in parallel.

I consider the SM57 the primary snare mic, so I positioned it so it sounded best. With the hats now further from the snare, I could get the SM57 straight in from the hi-hat sound, leaving the hats directly behind the mic in the null spot. Every cardioid mic has a null spot. The very nature of the cardioid polar pattern is that it picks up what’s in front of the mic and rejects what’s behind it. This is why almost all live mics are cardioid. Imagine if a singer’s vocal mic wasn’t cardioid and didn’t reject the noise behind it. There’d
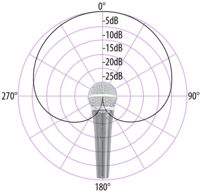
Cardioid picks up whats in front and to the sides and rejects everything else.

Cardioid pattern picks up whats in front and to the sides and rejects everything else.

be non-stop feedback. However, since cardioid only picks up what’s in front, it reduces what it picks up and means we only get feedback when a mic gets pointed towards a speaker. Well, that same logic applies in the studio. If you mic a snare with a cardioid mic, whatever’s behind the mic will be rejected. This means you’d ideally want to mic the snare directly from where the hats are, placing the hats behind the mic and thereby letting the mic reject the majority of the their sound. It’s tough to do this, though, especially if the hats are close to the snare. There just won’t be enough room to get a good angle on the snare AND keep the hats in the null spot AND keep the mic out of the way of the drummer. It’s usually a compromise and rarely do you get all three. Even with the drumming changes we made for this session, I still couldn’t achieve all three. In the end, I opted for getting a good angle on the snare and keeping the mic out of the way of the drummer. I compromised on getting the hats in the null spot, but it was close enough that a good portion of the hat sound was reduced.
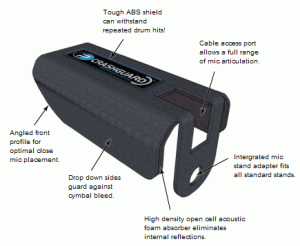
primacoustic_crashguardBesides, I had one more trick up my sleeve to kill the hats. I placed a ton of shielding around both snare mics, just to go the extra mile to kill any bleed. On the SM57, I used a Primacoustic CrashGuard. These are relatively new and it’s my first time using them, but man, they are amazing! It’s a plastic shield with foam on the underside that mounts to a mic stand and acts as a shield or “roof” to protect the mic under it from cymbal bleed. I had to be careful about angling the SM57 that it was shielding. If you angle the mic too much towards the shield, things can start sounding a little boxy — it becomes kinda noticeable (to my ears, at least) that something was there that was influencing the sound a bit. If you angle the mic too far away from the shield, you lose most of the benefits of it’s shielding. I eventually found the sweet spot and it worked absolutely perfectly.
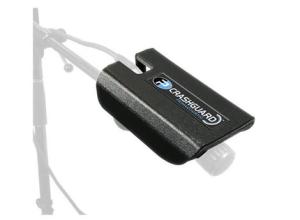
Primacoustic CrashGuard

Primacoustic CrashGuard

Between null spot positioning and the CrashGuard, I finally had a loud, clean, punchy snare with minimal bleed. On the Audix i5 mic, there wasn’t enough space to get another CrashGuard in there, so I instead used an Auralex Xpander foam piece. It’s a simple, rectangular piece of foam with a baffled side to break up sound, and a hole in the middle to stick a mic through it. I have to say, when I listened back and forth between the CrashGuard mic and the Xpander mic, there was a HUGE difference — the CrashGuard
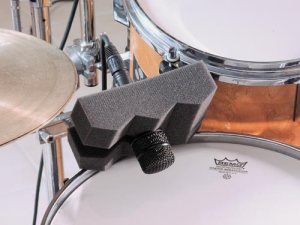
Auralex Xpander

Auralex Xpander

killed like 70% more hat bleed. The Xpander killed a decent amount, maybe 20-30%, and it was definitely better to have it in place than not. However, the CrashGuard won by a mile. (Admittedly, though, the CrashGuard mic was in a better spot and was null-rejecting more of the hat noise than the Xpander mic, plus the two mics were altogether different. It’d be interesting to see how the CrashGuard compares to the Xpander on the same mic in the same position. A future post, for sure!)

On the bottom of the mic, I placed another Shure SM57 to capture the snare wires. There’s no real magic to this one, just angled it away from the hats just like I did the top mic, although I did find a steeper vertical angle sounded better than a shallower horizontal angle. Your mileage may vary depending on how the drum sounds. The only catch with the bottom mic is that you will almost always have to invert the phase for this mic on your preamp or mixing console. Play around with mic position and phase until the bottom mic sounds good with the top mic(s). Remember, you’re capturing mainly snare wire sound on the bottom with just a touch of body to it. It’s not going to sound huge and thick like the top mic does. Play around with it until you’re adding a nice good crack sound to the top mics without losing any of their body — that’s when you’re in a good spot.

API 512c

API 512c

Lastly, I mounted a piezo trigger on the top snare head to capture each hit. I’ll use this trigger signal for blending in samples and perhaps use it to trigger a noise gate if there are any parts that need extra help and definition. For the most part, though, I’m very, very pleased with the snare sound I’m capturing and have a spare trigger track, just in case. Insurance is never a bad thing!

API 512c

For preamps, the top SM57 went into an API 512c for the same reasons as the kick mic — I need something fast and punchy. The API preamp will almost always win that battle. The  other top mic, the Audix i5, was fed into a channel of the Unverisal Audio 4-710d. I set it to 100% transistor mode so that it had a faster transient response. After all, tubes, by their vary nature, tend to slow transient response, and we definitely don’t want that on drums. The bottom SM57 went into an on-board preamp on my Allen & Heath ZED R16 mixing console. The pres on the ZED R16 are nothing to scoff at and are very high quality, so I had no qualms whatsoever about using them.
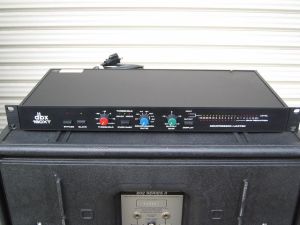
dbx 160XT

dbx 160XT

For processing, I gave both top mics a slight 3db boost around 200Hz to give the snare a bit more body. We had tons of *crack*, but it just need a touch of *oomph*. The bottom mic was unaltered.

For compression, the top SM57 going in the API 512c was sent to a vintage dbx 160XT compressor set to 4:1 ratio and -3db gain reduction. This is a really dirty, gritty compressor that sounds great on drums. The Audix i5 going into the 4-710d pre was sent to the 1176 compressor built into the preamp channel, on the Slow setting and about -3db reduction as well. These are very mild, almost imperceptible compression settings, but the goal is just to shave a few db’s off the loudest peaks to even things out a bit before being sent to the DAW.
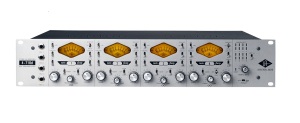
4-710d_FrontSnare is probably the trickiest single drum to record, but I’m very pleased with how it all turned out.

Posted in Uncategorized | Tagged , , , , | Leave a comment

Recording: Drums (Day 1 – Kick drum setup)

IMG_0306Our kick setup was real simple: 1 mic, 1 trigger. Last time we recorded, I used a second mic on the outside of the kick in an attempt to capture more body. Unfortunately, it just made the kick boomy, and I had much better results muting the 2nd mic, using a subharmonic enhancer on the 1st mic, and then blending in some kick samples to get more click and attack. This time, I discarded the 2nd mic altogether and added a trigger.

Luckily, it doesn’t take much to get a kick sounding good. It helped that the kick was nice and punchy and sounded good in the room to begin with, but that goes for all drums. If it doesn’t sound good by itself, it’s certainly not going to sound good (or better) once it’s under the microscope of multiple microphones.

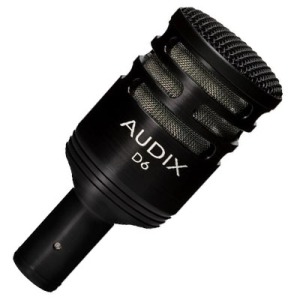
audix_d6So, I mic’d the kick just inside the hole, pointing the mic at the spot where the kick pedal beaters hit the head. If you go too far into the drum, you’ll get more click/attack — sometimes that’s necessary for really fast double kick parts, as too much low end will make it sound bloated and messy. For this particular kick, it’s more of a big meaty sound with not as much click, so I opted to capture as much of the body as possible while still getting some of the click. I used an Audix D6 kick mic and placed it about halfway into the kick drum.

Since we have some moderately fast double kick parts in the songs, I needed a preamp with a fast transient response that wouldn’t fart out or smear the signal when things picked up the tempo. I tried a few preamps (UA 4710-d, Neve 1073 clone, UA LA-610) but ended up going with the API 512c. It sounded best and had everything I needed, which is punchiness and fast transient response.

api_512cI also used a trigger on the batter-side of the kick. Triggers, for those who aren’t aware, are actually just tiny piezo microphones that mount to the head of a drum and only pickup the actual drum hits. This signal is recorded onto a separate track and can be used for triggering noise gates, sidechaining compressors or for triggering drum samples. I use them for all three purposes. In this particularly instance, the background noise is low enough that I don’t need it for gating — I can gate just on the actual mic signal since the kick hits are far louder than any other sound captured by that mic. My main use for the kick trigger is sample blending.

Neither the drummer nor myself particularly like sample replacement, where you completely replace the sound of the drum, but we also recognize that it’s hard to get a ‘modern metal’ drum sound just using the natural kit. So, we’ve decided to blend samples in  with the natural acoustic sound. We’ve tuned the drums to sound as heavy and punch as possible, and then we’ll use EQ and blended samples to augment the sound and get it where we want it to be. For this kick, since it has so much punch and meat/body already, we’ll most likely just blend in a really clicky kick sample to help it cut through the mix. This will be further down the line when we start mixing.

Posted in Uncategorized | Tagged , , , , | Leave a comment

Recording: Drums (Day 1 – Overhead Mics)

The first thing I setup is the overhead mics. These are the hardest to position and get just right, so I do them first so that I can really focus on capturing a phase-coherent sound with a good stereo image.

IMG_0314For those that are new to recording, phase is the single biggest make-or-break issue that you’re going to face. Budget mics? No problem, you can get by. Cheap preamps? You can make it work. Phase issues in the mics? Halt everything, do not proceed; nothing can fix this. In simple layman’s terms (since I don’t fully understand it myself), phase is how fast a sound travels to a mic and whether the waveform is in sync with other mics capturing the same sound.

Let’s create a real simple example. Let’s say there’s a single snare drum set up, no other drums or cymbals; just the snare. You want to record that with a single mic. You can move that mic around anywhere until the snare sounds good in it. You are capturing a single source with one mic, so there are no phase issues. Now that that single mic is in place, let’s add another mic. If you listen to this second mic combined with the first, you will hear that there are limited places you can place that second mic and still have it sound good. Why? Because the soundwaves from the snare are hitting the first mic at a certain speed and time and the second mic has to be in a position that is compatible with the first, otherwise the soundwave will cancel itself out. This is called being ‘out of phase’.
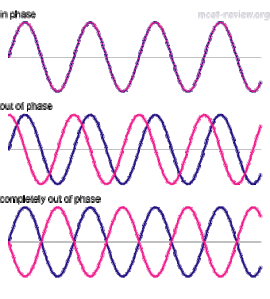
If you look at a waveform, it has up and downs, peaks and valleys. In a multi-mic setup, the mics need to be positioned so that the soundwaves are all reaching the mic at a peak, or they’re all reaching the mic at a valley. That is called being ‘in phase’. In the snare example above, if the soundwaves are reaching the first mic during a peak, and then they arrive at the other mic during a valley, what happens when they’re combined? Mathematically, if you think of the peak as 1 (positive) and the valley as -1 (negative), you end up with 0 when combined. Basically, the 2 signals are complete opposites and cancel each other out.
phaseIf it were as simple as just making sure the signal isn’t cancelled out, that would make mic alignment easy. The real world is not so kind, unfortunately. It’s nearly impossible to get 2 signals 100% opposite, out-of-phase from each other. If they were completely opposite, you’d end up with an absolutely dead silent signal. Instead, in the real world, mics end up a percentage (or degree) out of phase. Not perfect enough to cancel each other out, but just enough to degrade the signal and cause a weird hollow or whooshing sound.

Ever hear a phaser effect on guitar? It’s the one that makes an amp sound like a jet engine, wooshing up and down. That’s the sound of a signal going in and out of phase with itself. A phaser pedal takes the guitar signal, duplicates it, and then moves the duplicated signal in and out of phase with the original signal at a rate set by the control knob. The same effect can be achieved if you setup one mic on a guitar cabinet and, while a guitar is being played through the cab, move a second mic around the speaker while the first one stays in place. It’s the same thing — 2 signals, one staying still and the other one being moved in and out of phase.

Unfortunately, you can’t (easily) do the same thing on drums. Drums have a real short sound that lasts only as long as they’re being hit. So, instead of wooshy jet engine sound, the sound you hear when drum mics are out of phase is a reduced low-end or a hollowness to the sound. It’s something you just hear and it’s hard to describe, but if you have multiple mics setup on drums and the drums just don’t sound big and powerful, it’s almost certainly a phase issue.
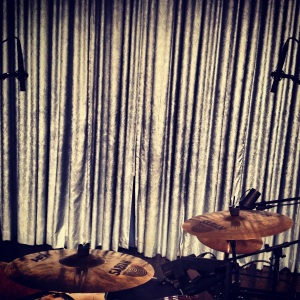
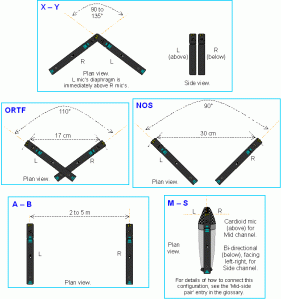
stereo_mics_1So, with a basic understanding of phasing and why it’s vital to get it right on drums (and why it’s important to do overhead mics first), it’s time to setup our overheads. I wanted to capture a large, wide stereo image, so I went with an A/B miking pattern instead of the narrower X/Y pattern. (X/Y is much easier and less likely to have phase issues, whereas A/B gives you a bigger sound and much larger phase issues.)

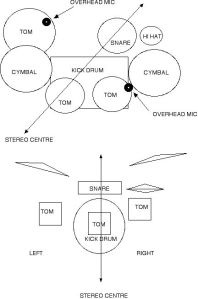
First thing to do is find the stereo center of the drum kit. What is the stereo center? It’s an imaginary line that cuts through the center of the kit and serves as the guideline when placing overhead Left and Right mics. If the overheads don’t have a good stereo balance, the drums will sound lopsided, causing the resulting mix to be lopsided as well. Most people think the center of the drum kit is the center of the kick, but that’s not the case. The loudest thing in a drum kit is the snare, and it’s the primary drum that everything else is built around. The stereo center of the drum kit starts with the center of the snare. If you imagine a top-down view of your drum kit, draw an imaginary line from the center of the snare to the center of your kick drum. That’s the center of your kit, and it’s almost guaranteed to be at an angle, not dead center through the front of the kit. Finding this center is vital with overheads because you need to place the left and right mic the same distance from this imaginary center line.

overheadsOn our drum kit, we found the center and then positioned the mics to the left and right. The left mic (covering the ride side of the kit) was above both the ride and the floor tom. The right mic (covering the hi-hat side of the kit) ended up being above and kind of between the hats and a crash cymbal. Again, this varies depending on the kit and layout, but this is what sounded good for us.

To make sure these were in phase,  I set up the first overhead above the hi-hats (the right mic)  until it sounded good. I then got out a tape measure and measured the distance between the center of the snare and the capsule of the mic. It was 44″ from snare to mic capsule. I then brought the other mic around near the floor tom and ride (the left mic) and set it up so that it was in line with the other mic. I then measured 44″ out from the center of the snare and moved the mic until it’s capsule was exactly at 44″. Then one final measurement from the left mic capsule to the right mic capsule, making sure it was 44″ as well. Good, all done. What we now have is a 44″ equilateral triangle. The two mic capsules are 44″ from each other and 44″ above and away from the snare. If you listen to just those two overheads while the drummer is playing, you should have a powerful stereo image with the snare dead center.

If anything sounds weak or lackluster, try moving one of the mics. Personally, I always set up the first mic (the right mic, over the hats) and get it sounding good by itself, and then I never touch it again. After measuring and making sure the equilateral triangle is setup properly, if I’m still not happy with the sound, I’ll move the left mic (the one above the ride-side of the kit) very small, tiny amounts until it sounds good. 99% of the time, it’s just a matter of angling the mic itself without even having to touch the stands. Once in awhile, though, the sound just won’t be right and you’ll have to start over.

IMG_0311Another thing to consider: you may have the right mic sounding great where it is, but when you’re setting up the triangle, you find the left mic is being forced into a bad position, like directly over the edge of a crash cymbal. This would cause a wooshing sound as the edge of the cymbal passes in and out under the mic, so it’s no good. In situations like this, you have to scrap the setup and go back to the drawing board. Find another position over on the right side that sounds good, then see where that puts the left mic. Eventually you will find the perfect spot where both mics sound great.

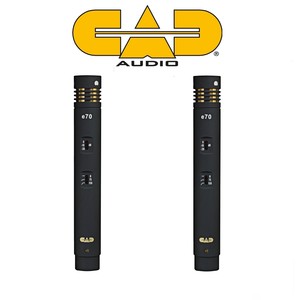
CAD_E70For this session, I used a pair of CAD E70 small diaphragm condenser (SDC) mics. These are great sounding mics (especially for the price — around $200 for the pair. Love CAD’s stuff!) and they have removable capsules. The pair I have came with both cardioid and omni capsules. For drum overheads, I use the cardioid capsules. I then ran both mics to a pair of channels on a Unversal Audio 4-710d preamp. It’s important to make sure the settings are the same on both channels — you don’t want one to be louder or quieter than the other, as that would skew the stereo image. I recorded these tracks raw and unprocessed — no EQ, no rolloffs, no compression. I’ll save all of that for the mixing stage.

One last tip: since the overheads capture so much cymbal sound, be very careful with the gain/trim on your preamp. It’s very easy to put too much gain on them and turn the cymbals into an aggressive hiss that is overly harsh. My rule of thumb is to get a good solid signal that isn’t distorted or harsh, and then back it off a bit more from there. This gives me an extra bit of “breathing room” or “buffer space”, so to speak, against those cymbals getting really nasty. Just listen and use your ears.

Posted in Uncategorized | Tagged , , , , | Leave a comment

Recording: Drums (Day 1 – Setup)

Finally time to start recording the final album! First up is drums.

Like I said in the last post, we did two rounds of demos for each song, so we’re pretty prepared going into this tracking session. We have the clicks and tempos already worked out and the drummer knows the parts so well, he can play the songs just by click with no other instrumentation (much tougher than it sounds!). With everything already taken care of in advance, that leaves us to focus solely on capturing the best performance we can.

IMG_0334Before we can record a single take, though, we need to do a ton of setup. My main (home) studio has a low 10′ ceiling, so it isn’t suitable or ideal for recording drums. We wanted something big and epic-sounding. When you hit the toms, we wanted it to sound like canons blasting. There’s a former-church-turned-nightclub near us where I’ve done live sound in the past. I’m very familiar with the room and knew it would give us what we wanted.

Traditional churches were built, by design, to allow sounds to carry sounds throughout the structure, particularly a preacher’s voice. After all, with many churches being well over a hundred years old, there were no such things as PA systems when they were built — amplification was achieved acoustically. The church we recorded in was well over a hundred years old and had a huge 40’+ tall cathedral ceiling. If this were still a church, it’d have been too echo-y to record. However, since this church was shutdown and converted into a nightclub, it had just enough objects and tables/chairs/etc. in it to diffuse most of the sound. What we were left with was a large room that was lively, but not overly so, with a nice big boom sound and pleasant echoing, but again, not so much that it’d be overkill.

IMG_0284So, we went on location to the church to record drums. I packed up the core pieces of my studio and setup shop in a side room connected to the big room. The control room wasn’t ideal, but it provided me enough separation from the live room that I could hear what was being recorded. And really, that’s the main thing: If you can monitor in a nicely tuned room, that’s icing on the cake, but just being able to hear clearly is enough to get you through almost any job.

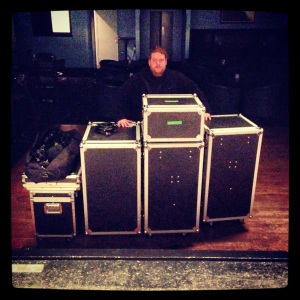
I ended up taking 2 large flights cases of preamps and compressors, 1 large case of mics/cables/tools/etc, a 6-space rack for DI/splitters/headphone distrubution/etc, a trunk for monitors/computer/computer monitor, a mixing console case and about 2 dozen mic stands. Not exactly a portable setup, but it was the bare minimum I needed to track this thing.

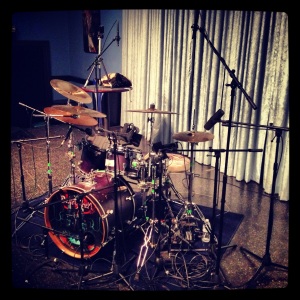
IMG_0335While I was unpacking and setting up the make-shift control room, our drummer, JT Penderville, was working  with Buddy Hoebler, our drum tech, to put new heads on the drums and tune it. They put a Remo Black X head on the snare and Evans EC2 SST Clear heads on the rack and floor toms. JT plays a 4 piece kit, with just a rack and floor tom, so he has a pretty minimal drum setup. From a recording perspective, it’s very nice because he doesn’t have anything unnecessary on the kit — what’s there is used and used extensively. So many drummers go overboard with unnecessary hardware and drums, it makes it tough to really capture a good stereo image of a kit. Not the case here. For cymbals, he used 13″ Sabian AAX hats, 17″ Sabian AAX Studio crash18″ Sabian AAX X-plosion crash, Sabian Rock Pro Ride and an 18″ Wuhan China

With the drums re-skinned, tuned, and my control room setup, we were ready to start mic’ing the kit. I’ll detail the gear and setup drum-by-drum in the next handful of posts.

Posted in Uncategorized | Tagged , , | Leave a comment